Are you noticing that your record player is unusually quiet? Experiencing low volume output or inaudible sound can be incredibly frustrating, as it impacts your ability to enjoy the music.
This troubleshooting guide will help you identify why your record player is so quiet and provide tips for resolving the issue. With the right steps, you’ll be able to get your record player back up and running smoothly. Let’s get started!
Actionable Steps
A. Checking the volume levels
1. Locate the volume control knob or slider on your record player. This will typically be located on the front of the device, near the power button and other playback controls. This can also be found on a remote control if you have one available.
2. Adjust the volume to a comfortable listening level. You may need to adjust the knob or slider more than once before finding a suitable volume level. If you continue to experience low sound levels, proceed to the next step.
3. Safety and maintenance tips: Do not turn the volume up to the maximum level immediately as this can damage your speakers and record player over time. Instead, gradually increase the volume to a suitable listening level.
B. Inspecting the turntable
1. Verify that your record player’s turntable is spinning at the correct speed (33 1/3 RPM or 45 RPM). This can be checked by playing a record and observing the speed of rotation for any irregularities.
2. Check for any debris or obstruction that may be preventing the turntable from spinning correctly. Removing any dirt, dust, and other particles can help improve sound quality and functioning.
3. Ensure that the turntable is balanced and leveled by adjusting it as necessary to avoid unnecessary strain on the system’s motor.
C. Checking the cartridges and needle
1. Ensure that the cartridge is properly seated and connected in the turntable’s tonearm. If it appears loose or disconnected, ensure that it is securely installed following the manufacturer’s instructions.
2. Verify that your record player’s stylus (needle) is not damaged and is clean. A dirty or worn-out needle can cause sound distortion, clicks, and other issues that may contribute to low volume output.
3. Replace the stylus if necessary. It is recommended to replace your stylus every 500-1,000 hours of use or after every 60-100 records.
D. Cleaning the equipment
1. Turn off the record player and disconnect it from power before attempting to clean any of its components.
2. Gently clean the turntable, stylus, cartridge, and other components with a soft, dry cloth or special cleaning solution designed for use on vinyl records.
3. Safety and maintenance tips: Avoid using abrasive or harsh cleaning solutions as they can damage the record player’s components over time. Always follow the manufacturer’s cleaning recommendations to ensure proper care of your equipment.
Helpful Diagrams, Charts or Photographs

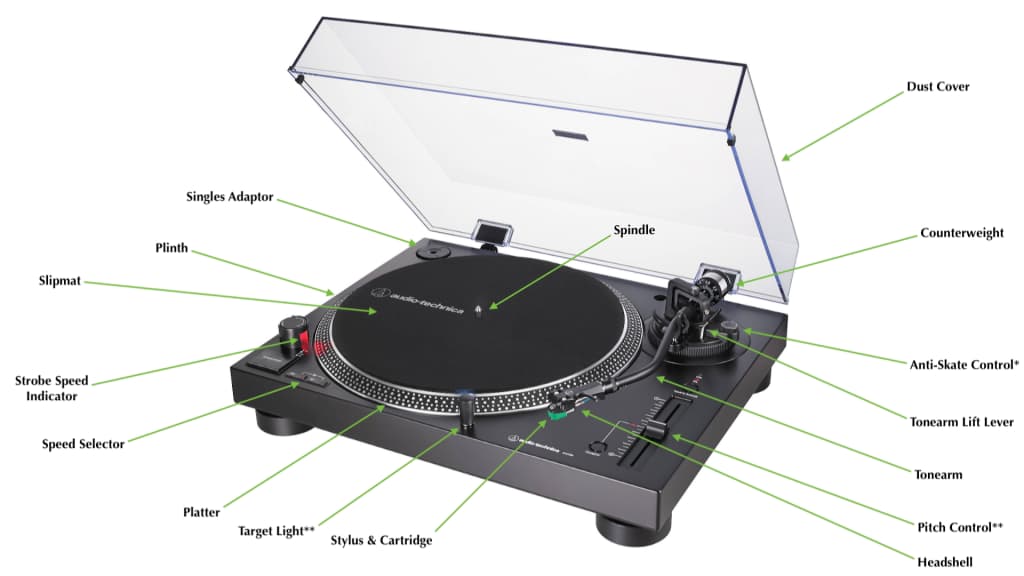
This diagram provides an overview of the components of a record player and their functions. It includes labels for the turntable (which holds and rotates records), the tonearm (which houses the cartridge and stylus), the power button, volume control, and other playback features.

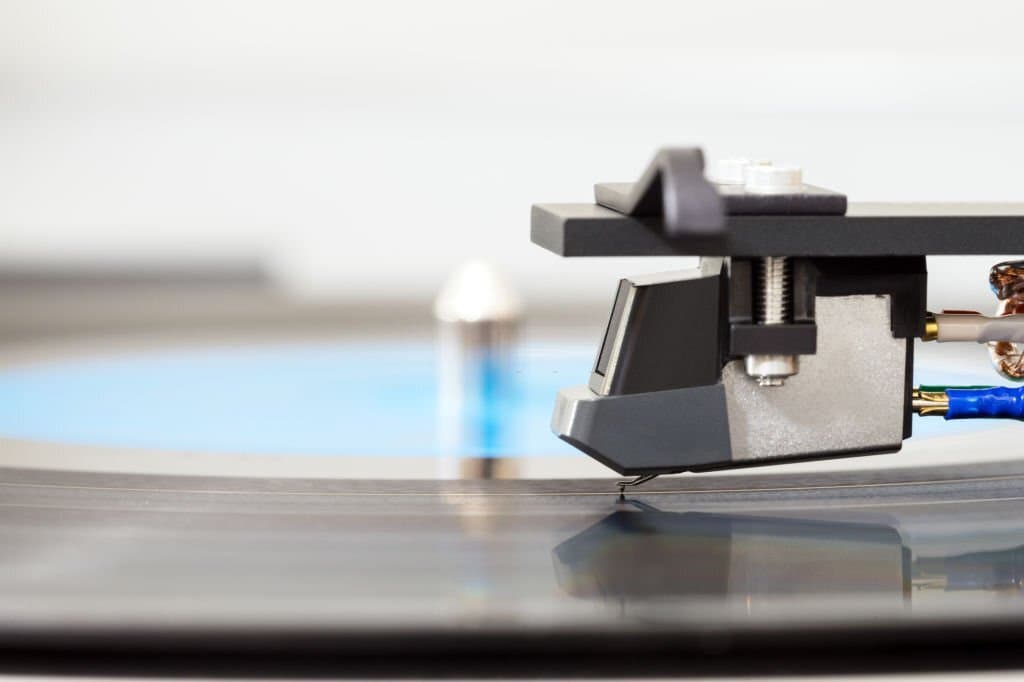
These images provide a detailed look at the cartridge, stylus, and turntable components of a record player. They highlight the shape and size of each component as well as its placement within the system.
Related Problems and Solutions
A. Distorted or crackling sound
1. Ensure that the record is clean and free of dust and debris by using a soft, dry cloth to remove any dirt, fingerprints, or other particles from the surface of the record. This will help reduce sound distortion.
2. Check for correct cartridge alignment on the tonearm according to manufacturer’s instructions; incorrect alignment can cause sound distortion and other issues.
B. Skipping or jumping tracks
1. Ensure that the turntable is properly leveled, as an unbalanced turntable can cause skipping during playback. If necessary, adjust the feet of the record player to make sure it is level on all sides.
2. Clean the stylus and record to ensure optimal performance. Use a special cleaning solution designed for use on vinyl records, or gently wipe down with a soft, dry cloth.
C. Incompatible or damaged equipment
1. Verify that all components of your record player (including the cartridge, stylus, tonearm, etc.) are compatible with each other. Refer to the manufacturer’s manual or contact customer support for assistance if necessary.
2. If any components appear damaged, consult the manufacturer’s manual or contact customer support for further assistance.
D. If the problem persists or worsens
1. Seek professional help from a qualified technician who is experienced in working with record players.
2. If the problem is not resolved after consulting a technician, consider upgrading to a more suitable record player or components that are compatible with each other and provide better performance. Contact the manufacturer for assistance if necessary.
FAQs
Is the volume turned up?
A. Yes, the volume should be turned up so that sound can be heard coming out of the speakers.
Are the speakers plugged in and working properly?
B. Check to make sure all connections are secure and properly plugged in, and check if the speakers are functioning correctly by testing with a different device.
Is there an issue with the cartridge alignment on the tonearm?
C. Check for correct cartridge alignment on the tonearm according to manufacturer’s instructions; incorrect alignment can cause sound distortion and other issues.
Are there any obstructions blocking sound from coming out of the speaker?
D. Ensure that there is nothing blocking the sound from coming out of the speakers, such as furniture or walls.
Are all components connected securely and tightly?
E. Make sure all components are securely connected and tightly fastened according to manufacturer’s instructions. Double-check all connections and make sure all components are firmly in place. If necessary, contact customer support for further assistance.
Conclusion
By following this comprehensive troubleshooting guide, you can identify and address the reason for your record player’s quiet output. Taking the time to maintain the equipment and ensure its proper functioning will prevent further issues and enhance your overall listening experience.


